Drip Irrigation Guide: Smarter Watering for Healthier Gardens
Save up to 60% water, reduce weeds, and deliver moisture directly to the root zone. Discover how drip irrigation transforms watering — from vegetable beds to landscaped borders.
LEARN THE BASICSWhat Is Drip Irrigation & Why It Matters
Drip irrigation is a highly efficient watering method that delivers water slowly and precisely to the root zone of plants through a network of tubes, emitters, and valves. Unlike sprinklers that spray water into the air — losing significant volume to evaporation and wind drift — drip irrigation places moisture exactly where it is needed, minimizing waste and maximizing plant uptake.
For home gardeners, landscapers, and small-scale farmers, drip irrigation offers a practical solution to water scarcity, rising utility bills, and inconsistent watering. By applying water at a slow rate, the soil absorbs moisture more effectively, reducing runoff and deep percolation losses. This method is particularly beneficial for vegetable gardens, raised beds, and landscaped borders, where consistent moisture is critical for optimal growth.
If you are tired of hand-watering or dealing with patchy lawn sprinklers, switching to a drip irrigation system is one of the most impactful upgrades you can make for your outdoor space. It not only conserves a precious resource but also promotes deeper root development and healthier, more resilient plants.
Top 5 Benefits of Drip Irrigation
Water Savings Up to 60%
Delivers water directly to roots, eliminating evaporation, runoff, and overspray common with sprinklers.
Healthier Plants
Consistent moisture reduces plant stress, promotes deep roots, and minimizes foliar diseases by keeping leaves dry.
Time & Effort Savings
Automate your watering schedule with timers and spend less time dragging hoses or standing with a watering can.
Weed Suppression
Targeted watering only wets the root zone, leaving surrounding soil dry and discouraging weed germination.
Flexible & Scalable
Easy to expand, modify, or relocate. Ideal for vegetable rows, flower beds, containers, and greenhouses.
Beyond these advantages, drip irrigation also supports organic gardening practices by reducing waterlogged soils that attract pests and diseases. For gardeners interested in permaculture, drip systems align perfectly with the principles of water conservation and regenerative land management.
Types of Drip Irrigation Systems
Choosing the right system depends on your garden size, plant types, and budget. Here is a breakdown of the most common types available:
💦 Point-Source Drip
Individual emitters deliver water to each plant. Ideal for widely spaced plants like tomatoes, peppers, and shrubs.
$40–$150 (starter kit)
Best for: Vegetable gardens, individual perennials.
🌊 Soaker Hose Drip
Porous hoses that weep water along their entire length. Simple, affordable, and great for dense planting rows.
$25–$80 (per 50ft hose)
Best for: Vegetable rows, flower borders, raised beds.
🔄 Micro-Spray / Micro-Sprinkler
Low-volume spray heads cover small areas. Good for ground cover, seedlings, and wider plant spacing.
$30–$120 (per zone)
Best for: Flower beds, ground covers, lawns.
📦 Drip Tape (Line-Source)
Flat, collapsible tubing with built-in emitters. Extremely water-efficient and popular in commercial farming.
$50–$200 (per roll)
Best for: Large vegetable gardens, row crops, greenhouses.
For most home gardens, a point-source drip kit with ¼-inch tubing and adjustable emitters offers the best balance of control and affordability. If you are planning a raised bed layout, consider a soaker hose for even distribution across the bed surface.
How to Install a Drip Irrigation System: 7 Steps
Installing a drip irrigation system is a straightforward weekend project. Follow these steps to design and set up your system for long-term success.
- Plan Your Layout — Sketch your garden beds, rows, or containers. Measure the distance from the water source to each area. Identify the number of plants or rows you need to water.
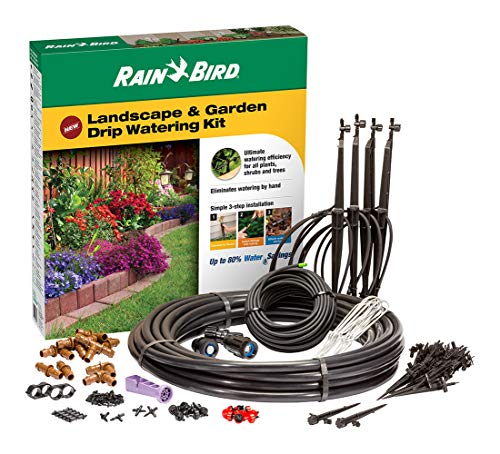
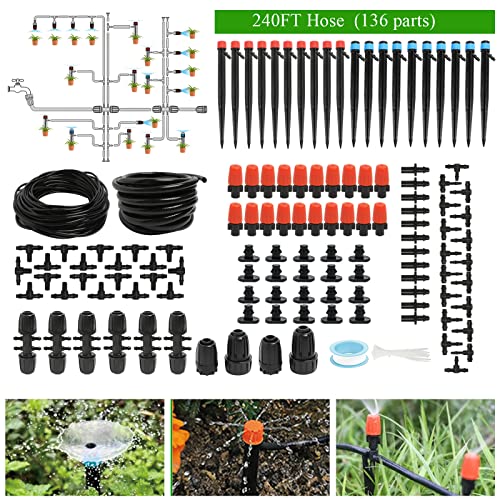
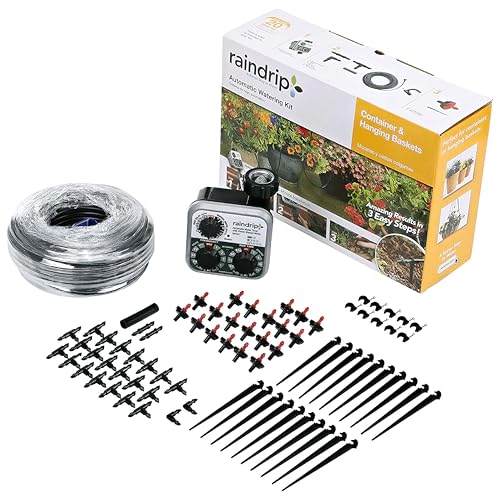
- Gather Components — Typical kit includes: backflow preventer, pressure regulator, filter, mainline tubing (½-inch), smaller distribution tubing (¼-inch), emitters, connectors, and end caps. Add a timer for automation.
- Connect to Water Source — Attach the backflow preventer to your outdoor faucet, followed by the pressure regulator (most drip systems need 25–30 PSI) and the filter to keep emitters from clogging.
- Lay Mainline Tubing — Run ½-inch tubing from the faucet along the edge of your garden area. Use stakes to hold tubing in place. Cut tubing as needed with a sharp knife or tubing cutter.
- Add Distribution Lines — Connect ¼-inch tubing from the mainline to individual plants or rows using barbed connectors. Insert emitters (1–2 gallons per hour recommended) at the base of each plant.
- Flush & Test — Before placing emitters, turn on the water and let it run for a few minutes to flush any debris. Then install emitters and check that each plant receives water. Adjust emitter flow rates if needed.
- Add Mulch & Timer — Cover the tubing with 2–3 inches of mulch to protect it from UV rays and retain soil moisture. Connect a watering timer to automate your schedule.
For larger properties or complex terrain, consider combining drip irrigation with drainage solutions to prevent waterlogging in low-lying areas. A well-designed system not only saves water but also complements landscaping by preserving soil structure and reducing erosion.
Drip Irrigation Maintenance Tips
🔧 Keep Your System Running Smoothly
- Clean filters regularly — Check and rinse the filter monthly during the growing season.
- Flush the system — Open the end cap of the mainline every few weeks to flush out sediment.
- Inspect emitters — Replace clogged or damaged emitters promptly. Use a pin or emitter cleaning tool for minor clogs.
- Winterize — Before freezing temperatures, drain all tubing and store removable parts indoors.
- Adjust as plants grow — Add or move emitters as perennials expand or new plants are added.
Proper maintenance ensures your system lasts for many seasons. If you are new to irrigation, consider starting with a pre-assembled kit that includes all essential components. Many kits are designed for easy connection to a standard garden hose, making them ideal for first-time users.
For gardeners who also use rain barrels, drip irrigation can be connected directly to the barrel using a small pump or gravity feed. This creates a highly sustainable, low-cost watering system that harnesses natural rainfall.
Frequently Asked Questions About Drip Irrigation
How much water does drip irrigation save compared to sprinklers?
Drip irrigation typically saves 40–60% more water than traditional sprinkler systems because it eliminates overspray, wind drift, and reduces evaporation by applying water directly to the root zone.
Can I install drip irrigation myself without a professional?
Yes, most drip irrigation kits are DIY-friendly and come with clear instructions. With basic tools and a few hours of work, you can install a system for your garden or raised beds.
What is the best drip irrigation system for a vegetable garden?
For vegetable gardens, point-source drip with 1 GPH emitters spaced 12–18 inches apart works well. Alternatively, soaker hoses are simple and effective for row crops like tomatoes, peppers, and cucumbers.
How often should I run my drip irrigation system?
Watering frequency depends on climate, soil type, and plant needs. In most gardens, running the system 2–3 times per week for 30–60 minutes per session is sufficient during the growing season. Use a soil moisture meter to fine-tune.
Can I use drip irrigation with a timer?
Absolutely. Battery-operated or smart timers can be attached to the faucet to automate watering schedules. This is especially useful for spring gardening and during vacation periods.