Seed Starting Guide: Grow Your Garden from Scratch
Starting seeds indoors gives you a head start on the growing season, saves money, and opens up a world of plant varieties you won't find at the nursery. Learn the proven techniques for healthy germination and strong seedlings.
Start Your Seeds TodayWhat Is Seed Starting?
Seed starting is the process of germinating seeds in a controlled environment—typically indoors—before transplanting the young plants into your garden. This method is especially valuable for gardeners in regions with short growing seasons, as it allows warm-season crops like tomatoes and peppers to mature before the first frost.
Beyond extending your season, starting seeds indoors lets you control every variable: moisture, temperature, light, and soil quality. You'll also save money compared to buying mature transplants, and you'll have access to hundreds of heirloom and specialty varieties that never appear at local garden centers.
The 7 Essential Steps to Seed Starting Success
Choose the Right Seeds
Select high-quality, disease-resistant seeds suited to your climate. Check the days-to-maturity on each packet and plan backward from your last frost date. Heirloom varieties offer unique flavors and colors, while hybrids often provide better disease resistance.
Use a Sterile Seed Starting Mix
Never use garden soil for seed starting—it compacts, drains poorly, and harbors pathogens. A light, sterile potting soil and potting mix blend provides the perfect balance of moisture retention and airflow for germinating seeds.
Choose the Right Containers
Seed starting trays, biodegradable pots, and soil blocks all work well. Whatever you choose, ensure proper drainage. Using plastic plant pots with drainage holes and saucer makes watering easier and prevents waterlogged roots.
Plant at the Correct Depth
Follow the seed packet instructions. As a rule of thumb, plant seeds two to three times as deep as their diameter. Tiny seeds like lettuce should barely be covered, while larger seeds like beans need deeper planting. Label everything!
Provide Consistent Moisture
Keep the seed starting mix evenly moist—not soggy. Use a spray bottle or bottom-watering to avoid displacing seeds. A humidity dome helps maintain moisture until germination occurs, then remove it to prevent damping off.
Supply Adequate Light
Once seedlings emerge, they need 14–16 hours of bright light daily. A sunny south-facing window may suffice, but grow lights provide consistent intensity. Keep lights 2–4 inches above the plants and raise them as seedlings grow.
Harden Off Before Transplanting
Gradually acclimate seedlings to outdoor conditions over 7–10 days. Start with a few hours of indirect sunlight and slowly increase exposure. This hardening-off process prevents sunscald and transplant shock when you move them to the garden.
Seed Starting Methods Compared
Different gardeners prefer different approaches based on their space, budget, and experience level. Here's how the most popular seed starting methods stack up against each other.
| Method | Best For | Ease of Use | Space Needed | Value Tier |
|---|---|---|---|---|
| Seed Starting Trays | Beginners, large batches of seeds | Very Easy | Moderate | Entry-Level |
| Soil Blocks | Experienced gardeners, no-plastic gardening | Moderate | Moderate | Mid-Range |
| Biodegradable Pots | Small batches, easy transplanting | Easy | Low | Budget-Friendly |
| Hydroponic Seed Starters | Indoor gardeners, soilless growing | Moderate | Low | Premium |
| Self-Watering Seed Kits | Busy gardeners, consistent moisture | Very Easy | Low | Mid-Priced |
For most home gardeners, seed starting trays combined with a quality potting soil and potting mix offer the best balance of convenience and results. As you gain experience, you can explore advanced methods like soil blocking or hydroponic systems. If you're looking for a more permanent setup, consider raised garden beds for vegetables or even plans to build a raised garden bed with legs for ergonomic, accessible gardening.
Choosing the Best Grow Lights for Seedlings
Light is the single most important factor in producing stocky, healthy seedlings. Without adequate light, seedlings become leggy and weak, stretching toward the nearest light source. While a sunny window can work for some plants, supplemental lighting is essential for serious seed starters, especially in late winter when natural light is weak.
LED grow lights are the modern standard—they're energy-efficient, run cool, and produce the full spectrum of light plants need. Fluorescent shop lights are a budget-friendly alternative that work well for seedlings. Place your lights just 2–4 inches above the plant canopy and run them 14–16 hours per day using a timer.
Soil, Moisture, and Temperature Control
Seed germination is triggered by three factors: moisture, temperature, and oxygen. A quality seed starting mix is light and fluffy, allowing oxygen to reach the seed while retaining enough moisture for germination. Avoid heavy garden soil or mixes with lots of fertilizer, which can burn delicate seedlings.
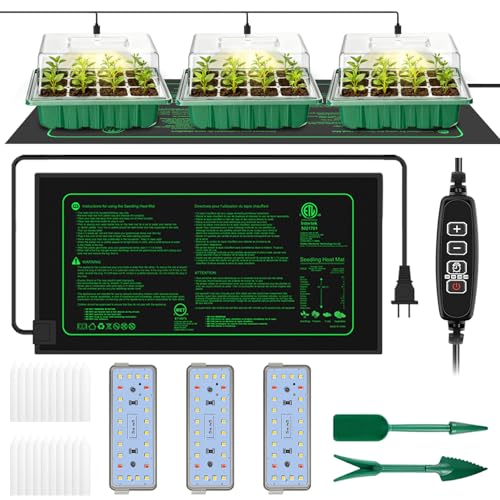
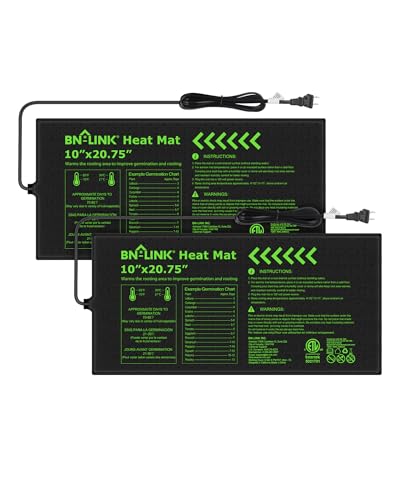
Most seeds germinate best at soil temperatures between 65°F and 75°F, though some warm-season crops like peppers prefer 80°F or higher. A seedling heat mat can dramatically improve germination rates for heat-loving plants. Once seedlings emerge, remove the heat mat and move them to a cooler spot with bright light to encourage sturdy growth.
Bottom watering is the preferred method for seedlings—it keeps foliage dry, prevents damping-off disease, and encourages deep root growth. Set your trays in a shallow pan of water for 15–20 minutes, then remove and let them drain. For containers, using plastic plant pots with drainage holes and saucer simplifies this process.
Common Seed Starting Mistakes to Avoid
Starting too early: Seedlings that outgrow their indoor space before the weather warms up become stressed and leggy. Check your last frost date and count backward using the days-to-maturity on the seed packet.
Overwatering: Damping-off disease kills more seedlings than any other cause. Always use sterile mix, bottom water when possible, and provide good airflow with a small fan on low speed.
Insufficient light: If your seedlings look pale, thin, and stretched, they need more light. Move them closer to the grow light or increase the hours of exposure. Remember, a windowsill alone rarely provides enough light for strong growth.
Skipping hardening off: Moving seedlings directly from cozy indoor conditions to harsh outdoor sun and wind causes sunscald, wilting, and transplant shock. Always acclimate them gradually over at least a week.
Using the wrong soil: Garden soil is too heavy for seed starting and contains weed seeds and pathogens. Invest in a dedicated potting soil and potting mix or seed starting mix for the best results. For outdoor garden beds, raised bed soil or premium organic garden mix provides the foundation for healthy growth.
Frequently Asked Questions About Seed Starting
When should I start seeds indoors?
Start seeds 6–8 weeks before your last expected frost date for most vegetables and flowers. Slow-growing plants like peppers and eggplant may need 8–10 weeks, while fast growers like lettuce and radishes need only 4–6 weeks. Check your local frost date and the seed packet for specific recommendations.
Do I need a heat mat for seed starting?
A heat mat is highly recommended for warm-season crops like tomatoes, peppers, and eggplant, which germinate best at soil temperatures of 75–85°F. Cool-season crops like lettuce and broccoli germinate fine at room temperature. A heat mat can cut germination time in half for heat-loving plants.
How do I prevent leggy seedlings?
Legginess is caused by insufficient light. Keep grow lights 2–4 inches above the plants and run them 14–16 hours daily. Once seedlings emerge, provide a small fan on low speed to simulate gentle wind, which encourages stocky, strong stems. Cooler temperatures (65–70°F) also help prevent stretching.
Can I use regular potting soil for seed starting?
Regular potting soil is too heavy and contains too many nutrients for delicate seeds. Use a dedicated seed starting mix, which is lighter, sterile, and low in nutrients. Once seedlings develop their first true leaves, you can pot them up into a richer potting soil and potting mix.
How often should I water seedlings?
Check moisture daily by touching the surface of the mix. Water when the top inch feels dry, but before the mix pulls away from the sides of the container. Bottom watering is best—let trays sit in a shallow pan of water for 15–20 minutes, then drain. Seedlings need less water than you might think, and overwatering is the leading cause of seedling death.
Ready to Start Your Seeds?
Seed starting is a skill that improves with practice. Start with a few easy varieties like tomatoes, marigolds, or lettuce, and expand as you gain confidence. With the right seed starting mix, adequate light, and consistent moisture, you'll be rewarded with healthy, vigorous seedlings ready to thrive in your garden.
Explore our complete seed starting guide and browse our raised garden beds for vegetables to set up your ultimate growing space.