Installing a Drip Irrigation System for Raised Beds
Save water, save time, and grow healthier plants with a customized drip irrigation system for your raised bed garden.
A drip irrigation system for raised beds is one of the most efficient ways to water your vegetables, flowers, and herbs. Unlike overhead sprinklers that waste water to evaporation and runoff, drip irrigation delivers moisture directly to the root zone, where plants need it most. This method not only conserves water but also reduces weed growth and prevents foliar diseases by keeping leaves dry.
Whether you are a beginner or an experienced gardener, installing a drip irrigation system in your raised beds is a manageable DIY project that pays off in healthier plants and lower water bills. This comprehensive guide will walk you through the entire process, from planning and choosing components to installation and maintenance.
Why Choose Drip Irrigation for Raised Beds? Drip irrigation uses 30–50% less water than sprinklers, reduces weed pressure, and delivers nutrients directly to plant roots. It's the gold standard for vegetable gardens, especially in raised beds where soil dries out faster.
Key Components of a Drip Irrigation System
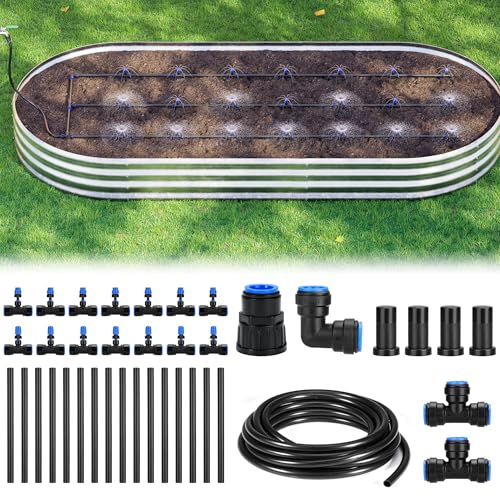
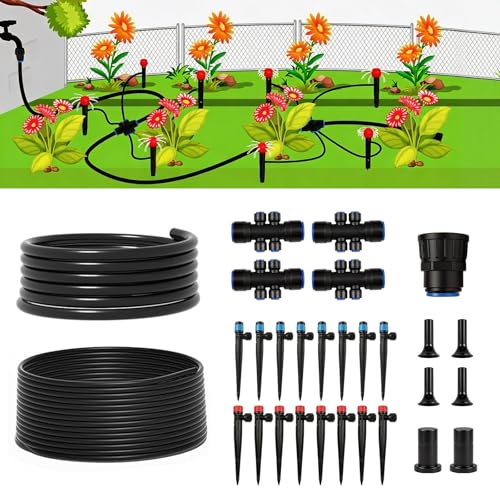
Before you start installing, it's essential to understand the main parts of a drip irrigation system. Here are the core components you'll need for your raised beds:
Backflow Preventer
Prevents contaminated water from flowing back into your home's water supply.
Pressure Regulator
Reduces water pressure to the optimal 25–30 PSI for drip emitters.
Filter
Removes debris and sediment that can clog emitters.
1/2" Poly Tubing
The main supply line that runs along your raised beds.
1/4" Drip Tubing
Branch lines that deliver water to individual plants or rows.
Emitters / Drippers
Deliver a precise flow rate (e.g., 0.5, 1, or 2 GPH) to each plant.
Stake Holders
Secure the tubing in place and keep it tidy.
Connectors & Fittings
Tees, elbows, and couplers to create your custom layout.
Step-by-Step Installation Guide
Follow these steps to install a reliable drip irrigation system for your raised beds. The process is straightforward and requires basic hand tools.
Step 1: Plan Your Layout
Start by sketching your raised beds, noting the dimensions and the types of plants you're growing. Vegetable garden plants like tomatoes, peppers, and squash have different watering needs, so plan emitter placement accordingly. For row crops like lettuce or carrots, use drip tape or soaker hoses for even coverage.
Determine the flow rate (GPH) needed for each plant. Most vegetables require 1–2 gallons per week, so a 1 GPH emitter running for 30 minutes twice a week is a good starting point. If you're growing in multiple raised beds, consider splitting your system into zones to manage water pressure and plant needs more effectively.
Step 2: Gather Your Materials
Based on your layout, purchase all necessary components. A typical starter kit for a 4' x 8' raised bed includes a backflow preventer, pressure regulator, filter, 25 feet of 1/2" tubing, 25 feet of 1/4" tubing, 10–20 emitters, and various fittings. You can find complete kits or individual parts at your local garden center or online.
Pro Tip: For larger gardens, consider a timer to automate your watering schedule. This is especially useful if you're away during the day or want consistent watering for growing tomatoes and other thirsty crops.
Step 3: Connect to the Water Source
Install the backflow preventer, pressure regulator, and filter onto your outdoor spigot or main irrigation line. This assembly ensures that water entering your drip system is clean and at the right pressure. Use Teflon tape on all threaded connections to prevent leaks.
If you have an existing in-ground sprinkler system, you can tap into it using a dedicated valve and adapter, but ensure the system is properly winterized to avoid damage.
Step 4: Lay the Main Supply Line
Run the 1/2" poly tubing from your water source to the edge of your raised bed. Use stakes to secure the tubing every 2–3 feet. If you have multiple beds, use a tee connector to split the line. Allow the tubing to warm in the sun for a few minutes before unrolling – this makes it more flexible and easier to work with.
Step 5: Install Emitters and Drip Lines
Use a hole punch to create openings in the 1/2" tubing where you want to place emitters. Insert a barbed connector or emitter directly into the hole. For plants spaced further apart, use 1/4" tubing to run from the main line to each plant, ending with an emitter at the root zone.
For crops like cucumbers or squash, which have extensive root systems, use two emitters per plant to ensure adequate moisture. Place emitters about 6–12 inches from the plant stem, depending on the plant's size and root spread.
Step 6: Secure and Flush the System
After laying all lines and emitters, secure everything with stakes. Open the water source and flush the system for 2–3 minutes with the end caps removed to clear any debris. Then, close the caps and check for leaks at all connections. Adjust emitter flow rates as needed by swapping out for different GPH ratings.
Step 7: Set a Watering Schedule
The ideal watering schedule depends on your climate, soil type, and plants. A good rule of thumb is to water deeply 2–3 times per week, aiming for 1–1.5 inches of water per week. For sandy soils, water more frequently with shorter durations. Clay soils retain moisture longer, so water less often.
Use a moisture meter or simply check the soil 2–3 inches deep – if it's dry, it's time to water. Over time, you'll learn the rhythm of your garden. For most raised bed vegetables, 30–45 minutes of drip irrigation at 1 GPH per emitter is a solid starting point.
Maintenance Tips for Longevity
A well-maintained drip irrigation system can last for years. Here are some key maintenance practices:
- Clean the filter: Check and clean the filter at least once a month during the growing season.
- Flush the system: Open the end caps and flush water through the lines every few weeks to remove sediment.
- Check for leaks: Inspect connections and tubing for cracks or damage, especially after winter.
- Winterize: Drain all water from the system and store components indoors if you live in a freezing climate.
- Adjust emitters: As plants grow, their water needs change. Adjust flow rates or add additional emitters for large, mature plants.
By following these simple steps, you can ensure your drip irrigation system continues to deliver consistent moisture, helping your raised bed garden thrive season after season.
Common Mistakes to Avoid
- Insufficient pressure: Without a pressure regulator, high water pressure can blow out emitters or cause misting instead of dripping.
- Clogged emitters: Always use a filter and flush the system to prevent clogging from small debris.
- Underwatering: Drip irrigation is precise, but you still need to ensure enough runtime to water the full root zone.
- Over-complicating the layout: Keep it simple. Straight lines with evenly spaced emitters work best for most raised beds.
Final Thought: Installing a drip irrigation system for raised beds is a smart investment that pays for itself in water savings and healthier plants. Whether you're growing tomatoes, peppers, or leafy greens, this efficient system will give you a productive and low-maintenance garden.