How to Add Drip Irrigation to Your Existing Sprinkler System
Upgrade your landscape watering with a simple conversion. Save water, reduce waste, and deliver moisture exactly where your plants need it most.
SHOP CONVERSION KITS →Let Gardening guide you: Converting a traditional sprinkler zone to drip irrigation is one of the smartest upgrades for your garden. It reduces water usage by up to 50%, prevents overspray, and targets the root zone of your plants for healthier growth. This guide covers everything you need—from choosing the right conversion kit to step-by-step installation.
Why Convert to Drip Irrigation?
💧 Water Conservation
Drip systems use 30–50% less water than traditional sprinklers by delivering water directly to the root zone, reducing evaporation and runoff.
🌱 Healthier Plants
Consistent moisture at the roots reduces stress, prevents fungal diseases on foliage, and encourages deep root growth.
🕒 Saves Time
Set it and forget it with automated timers. No more moving sprinklers or worrying about watering schedules.
💰 Cost-Effective
Lower water bills and reduced plant replacement costs make drip irrigation a smart investment for any gardener.
Step-by-Step Conversion Guide
Adding drip irrigation to an existing sprinkler system is simpler than you might think. Follow these steps to convert a standard sprinkler zone to drip irrigation.
- Step 1: Identify the Zone — Choose which sprinkler zone you want to convert. Ideally, select a zone with flower beds, vegetable gardens, or shrubs. Turn off the water supply and release pressure from the system.
- Step 2: Remove Sprinkler Heads — Unscrew the existing sprinkler heads from the risers. Keep the risers intact; you'll attach the drip conversion adapter directly to them.
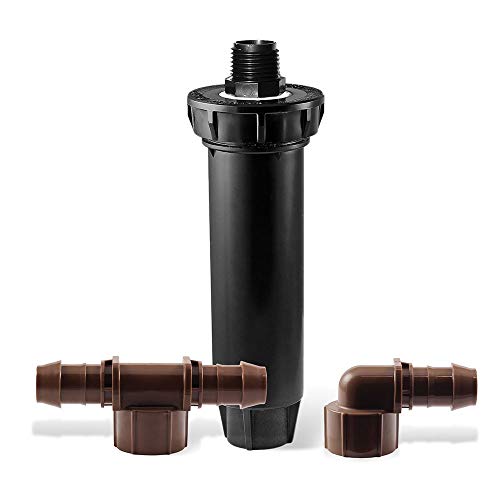
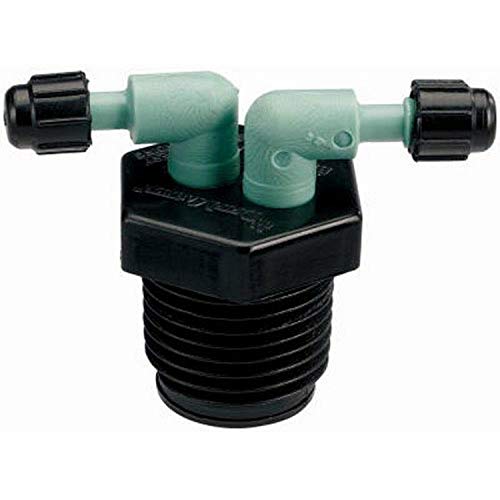
- Step 3: Install a Drip Conversion Kit — Most kits include pressure regulators, filters, and adapters. Attach the pressure regulator to the riser, then connect the filter. This ensures your drip system operates at the correct pressure (typically 25–30 PSI) and prevents clogs.
- Step 4: Lay Out the Drip Tubing — Run the ½-inch or ¼-inch drip tubing along the base of your plants. Use stakes to secure the tubing in place. Keep tubing within 1–2 feet of plant root zones.
- Step 5: Install Emitters — Depending on your plants, install drip emitters (1/2 GPH, 1 GPH, or 2 GPH) at each plant's root zone. For vegetable gardens, use inline drip tubing with pre-spaced emitters for even coverage.
- Step 6: Test and Adjust — Turn the water back on and check each emitter for proper flow. Adjust run times on your timer to accommodate the slower application rate of drip irrigation—typically 30–60 minutes per session.
For more inspiration on water-efficient gardening, check out our guide on drought-tolerant plants that thrive with minimal water. If you're also considering solar bird bath fountains, we have tips for those too.
Choosing the Right Drip Conversion Kit
Not all conversion kits are created equal. Here's what to look for to ensure a seamless upgrade:
Pressure Regulator
Most sprinkler systems run at 40–60 PSI, but drip systems need 25–30 PSI. A regulator is essential.
$15–$30Filter
Prevents debris from clogging emitters. Choose a 150-mesh filter for standard use.
$10–$25Adapters & Fittings
Ensure you have the right threaded adapters to connect to your existing risers (typically ½-inch female threads).
$10–$20Tubing & Emitters
Choose ½-inch tubing for main lines and ¼-inch for branch lines. Emitters should match the water needs of your plants.
$20–$50 (per roll)Pro Tip: If you have an automated sprinkler timer, you can keep it. Just adjust the run times and frequency. Drip systems typically require longer run times (e.g., 45 minutes) but less frequent watering (e.g., 2–3 times per week).
Also, consider using a balanced fertilizer alongside your drip system to maximize plant health.
Common Mistakes to Avoid
- Not using a pressure regulator: High pressure can blow emitters off or cause misting.
- Placing emitters too far from plants: Ensure water reaches the root ball.
- Overlapping zones: Design your layout to avoid water waste.
- Forgetting to flush the system: After installation, flush the lines before adding emitters to remove debris.
If you're also interested in front yard landscaping ideas with rocks and plants, or need advice on keeping deer out of your garden, we have you covered. Our goal is to help you create a thriving, low-maintenance landscape.
Ready to upgrade? Converting a sprinkler zone to drip irrigation is a weekend project that pays off for years. With the right kit and a little planning, you can enjoy a healthier garden, lower water bills, and more time to relax in your outdoor space.
Browse our recommended products below to get started. Each item has been selected to ensure compatibility and ease of installation.