
Adding a Drip Line to an Existing Irrigation System
If you already have a sprinkler system in place, you do not need to start from scratch to enjoy the benefits of drip irrigation. Converting a zone—or simply tapping into an existing line—is one of the most practical upgrades a gardener can make. This guide walks you through the planning, components, and installation steps so you can deliver water precisely to the roots of your plants while reducing waste, runoff, and disease pressure.
Why Add a Drip Line to Your Existing System?
Drip irrigation delivers water slowly and directly to the root zone, which is especially valuable for raised garden beds, vegetable plots, and mixed borders where overhead sprinklers waste water and encourage foliar disease. Adding a drip line lets you keep your existing valves, controller, and mainlines while gaining better control over moisture levels. It also makes it easier to water individual plants at different rates by selecting emitters that match each plant's needs.
For gardeners managing raised bed vegetable gardens or containers, drip lines are particularly efficient. They reduce evaporation, keep foliage dry, and can be paired with self-watering systems for outdoor potted plants for a more resilient setup. If your existing system is a sprinkler-based setup, see our companion guide on adding drip irrigation to an existing sprinkler system for additional context.
Assessing Your Existing Irrigation System
Before you cut into any pipe, take time to understand what you are working with. Locate the valve box, identify which zones serve which areas, and note the flow rate and pressure of your system. A typical residential sprinkler zone delivers between 5 and 8 gallons per minute at 40 to 60 PSI. Drip lines, however, are designed to run at much lower pressure—usually 20 to 30 PSI—so a pressure regulator is mandatory.
Check whether your controller supports separate run times per zone. Drip zones need longer, slower cycles than lawn zones. If your controller only allows a single schedule, consider upgrading to a model with per-zone programming. Also inspect the existing pipe material—PVC, poly, or PEX—because your connection method will depend on it.
- Valve box: Identify the valve and zone you plan to convert or tap into.
- Pressure and flow: Measure with a pressure gauge and a flow test at the spigot.
- Controller: Confirm it supports per-zone schedules and multiple start times.
- Pipe type: Note whether the mainline is PVC, poly, or another material.
Components You Will Need
A retrofit drip system uses a handful of standard parts. The exact list depends on whether you are converting an entire zone or simply tapping into a line to serve a bed. Entry-level retrofit kits usually include the essentials, while mid-range and premium kits add better filters, more durable fittings, and inline emitter tubing.
- Pressure regulator: 20–30 PSI, sized to your zone's flow.
- Filter: 150–200 mesh screen or disc filter to protect emitters.
- Adapter: To connect your existing pipe to the drip tubing (threaded or compression).
- Drip tubing: Either inline emitter tubing or blank tubing with punch-in emitters.
- Emitters or drippers: Match flow rate to plant needs (typically 0.5, 1, or 2 gallons per hour).
- Fittings: Elbows, tees, couplers, and end caps for your tubing size.
- Stakes and hold-downs: To keep tubing in place.
- Flush valve: At the end of each run for periodic cleaning.
Budget-friendly setups often use blank tubing with punch-in emitters, while mid-tier and high-end systems favor inline emitter tubing for faster installation and more uniform output. Choose one approach and stay consistent so maintenance stays simple.
Step-by-Step Installation
Step 1: Shut Off Water and Relieve Pressure
Turn off the zone at the controller and close the valve. Open a manual bleed screw or a downstream hose bib to release pressure before cutting any pipe.
Step 2: Cut Into the Existing Line
Choose a location downstream of the valve where you can install the regulator and filter. Use a pipe cutter for PVC or a barbed tee for poly pipe. Keep the cut clean and deburr the edges so fittings seat properly.
Step 3: Install the Pressure Regulator and Filter
Install the pressure regulator first, then the filter, in the direction of water flow. Threaded connections should be wrapped with Teflon tape. This order protects both the regulator and the emitters from debris.
Step 4: Connect the Drip Tubing
Use an adapter to transition from your mainline to the drip tubing. If you are using inline emitter tubing, simply run it along the planting area. If you are using blank tubing, punch in emitters at the spacing that matches your plants. For container vegetables, run a short length of tubing to each pot with a dedicated emitter.
Step 5: Lay Out and Secure the Tubing
Run tubing along rows or in loops around individual plants. Secure with stakes every few feet and at turns. Keep emitters a few inches from plant stems to avoid crown rot, and orient them so water drips onto the soil rather than the foliage.
Step 6: Flush and Test
Before closing the ends, run water through the tubing to flush out debris. Then install end caps or flush valves and run the zone to check for even output, leaks, and proper coverage. Adjust emitter placement as needed.
Step 7: Set Your Controller
Extend the run time for the drip zone—typically 30 to 90 minutes depending on emitter flow and soil type. Water deeply and less frequently to encourage deep roots. Monitor for a week and adjust based on plant response and weather.
Common Mistakes to Avoid
- Skipping the pressure regulator: Drip fittings will blow off or leak under sprinkler pressure.
- Forgetting the filter: Emitters clog quickly without filtration, especially in areas with hard water.
- Overloading the zone: Total emitter flow should stay under about 75 percent of the zone's rated flow.
- Running the same schedule as lawn zones: Drip needs longer, slower cycles.
- Placing emitters too close to stems: This invites rot and fungal issues.
Maintenance Tips for a Long-Lasting Drip System
Flush the lines at the start and end of each growing season, and check emitters monthly for clogs. If your water is mineral-rich, a mild vinegar flush can dissolve buildup. Inspect the filter regularly and clean or replace the screen when it becomes dirty. In colder climates, drain the drip lines before the first freeze and store removable components indoors.
Pair your drip system with good soil preparation. Amending beds with quality soil—such as the options in our guide to organic soil for raised bed vegetable gardens—helps plants make the most of the steady moisture drip provides. For tomatoes and other heavy feeders, see potting soil for growing tomatoes in containers to get the most from your drip setup.
Frequently Asked Questions
Can I connect a drip line directly to a sprinkler zone without a pressure regulator?
No. Standard sprinkler systems operate at higher pressure than drip lines can handle. Always install a pressure regulator rated between 20 and 30 PSI before the drip tubing to prevent fittings from blowing off and to ensure even water distribution.
How many drip emitters can I run on one sprinkler zone?
It depends on the flow rate of your zone and the emitter size. A typical zone delivering 5 to 8 gallons per minute can support roughly 100 to 200 one-half-gallon-per-hour emitters. Always calculate total emitter flow so it does not exceed about 75 percent of the zone's rated flow.
Do I need a filter when converting a sprinkler zone to drip?
Yes. Drip emitters have tiny orifices that clog easily from debris and mineral buildup. Install a 150 to 200 mesh screen filter or a disc filter directly after the pressure regulator to protect the emitters and extend the life of the system.
Will a drip line work with an existing timer or controller?
Yes, in most cases. Drip lines work well with standard controllers, but because drip delivers water slowly, you will need to run the zone longer. Many controllers allow you to set separate run times per zone, so you can extend the drip zone schedule while keeping lawn zones unchanged.
Can I bury drip tubing underground?
You can bury inline emitter tubing a few inches below the surface for a cleaner look, but keep it below the mulch layer and above the root zone. Avoid burying it too deep, and mark its location so you do not damage it during future digging or aeration.
Final Thoughts
Adding a drip line to an existing irrigation system is a straightforward project that pays dividends in water savings and plant health. By installing a pressure regulator, a filter, and quality tubing, and by adjusting your controller schedule, you can convert an underperforming zone into a precise, efficient watering system. Whether you are caring for a raised bed vegetable garden or a collection of containers, drip irrigation gives you control and consistency that overhead sprinklers simply cannot match.
Recommended Drip Irrigation Tools and Supplies
⚠️ AFFILIATE DISCLOSURE: This website contains affiliate links. As an Amazon Associate, we earn from qualifying purchases. If you make a purchase through these links, we may receive a small commission at no additional cost to you. Read our full affiliate policy.

Inntop 240FT Drip Irrigation System Kits, Quick Connect Automatic Garden Watering System for Raised Bed, Potted Plants, Lawn, Greenhouse with 1/2 inch Hose 1/4 inch Tubing and Accessories
Check price on Amazon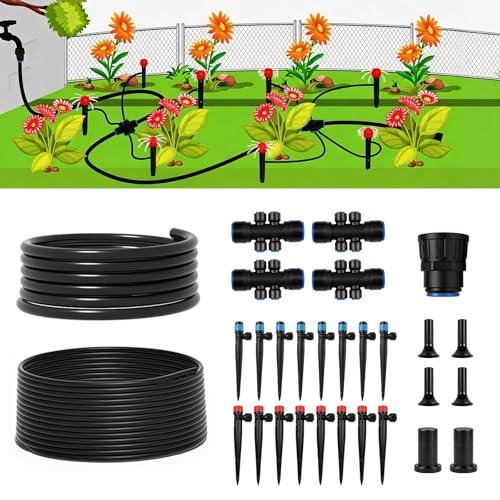
100FT Drip Irrigation System Kit, Quick Connect Garden Watering System, Easy Install Drip Irrigation Kit with 1/2" & 1/4" Tubing, Adjustable Emitters for Garden, Raised Beds, Greenhouse
Check price on Amazon
Raindrip 016010T 1/4-Inch Drip Irrigation Supply Tubing, 100-Foot., for Drip Irrigation, Drip Emitters, Irrigation Parts, Systems, Black Polyethylene
Check price on Amazon
50FT 1/4 Inch Drip Irrigation Tubing with 5 Pack Push-to-Connect 1/4" Tee Connectors, Distribution Drip Line Hose & Universal Tee Fitting, for Drip Irrigation Parts or Drip System and Misting System
Check price on Amazon
MIXC 230FT Quick-Connect Drip Irrigation System Kit, Automatic Garden Watering System with 1/4" & 1/2" Fast-Lock Tubing - Adjustable Nozzles & Sprinklers for Garden, Greenhouse, Lawn, Potted Plants
Check price on Amazon
240FT Drip Irrigation System Kits, Quick-Connect Garden Watering System for Raised Bed, Potted Plants, Lawn, Greenhouse with 1/2 inch Hose 1/4 inch Tubing and Accessories
Check price on Amazon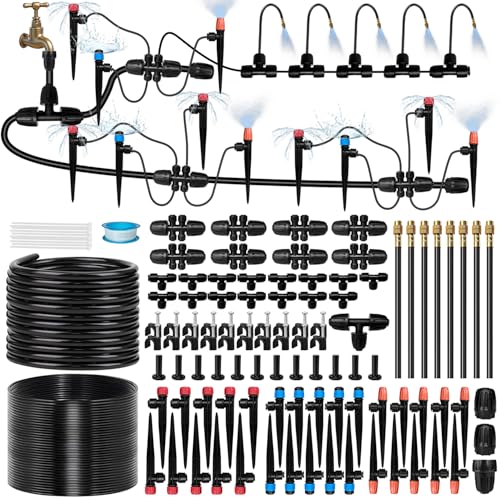
230FT Drip Irrigation System for Garden with 38pcs Adjustable Copper Nozzles & Emitters, Automatic Garden Watering System with 1/2" & 1/4" Tubing for Raised Bed, Yard, Greenhouse, Potted Plants, Lawn
Check price on Amazon
Raindrip S5600UB, Smart Loc Universal Coupling, Drip Irrigation Fitting for 1/2-Inch, 5/8-Inch, & 0.710-Inch Supply Tubing and Dripline, Black
Check price on AmazonDisclaimer
Let Gardening provides educational content only. Not a substitute for professional horticulturist or landscape architect services. Always consult a qualified professional for major landscaping or agricultural work. Some content may use AI. We are not responsible for plant damage, injuries, or outcomes. By using this site, you accept these terms. If you do not agree, please leave this website and discontinue its use. Read full disclaimer.