Best Way to Get Rid of Weeds and Grass in a Gravel Driveway
A clean, weed-free gravel driveway transforms the look of your property and protects the surface from long-term damage. This guide breaks down the most effective manual, chemical, and natural methods, along with a proven prevention plan so regrowth never gets the upper hand.
Why Weeds and Grass Thrive in Gravel Driveways
Gravel driveways are a magnet for unwanted vegetation because the loose stone creates a perfect germination bed. Wind-blown seeds settle into the gaps, moisture collects between stones, and a thin layer of dust and organic debris slowly forms a seedbed. Once established, grasses and deep-rooted weeds like dandelions and thistles anchor into the sub-base, making them surprisingly difficult to pull.
Understanding the root cause matters because it shapes your strategy. A driveway that only has surface weeds needs a different approach than one where grass has woven roots through a fabric barrier. The best way to get rid of weeds and grass in a gravel driveway always combines immediate removal with a barrier that prevents the next generation of seeds from taking hold.
Best Removal Methods Compared at a Glance
There is no single perfect method for every driveway. The right choice depends on the severity of the infestation, whether you want to avoid chemicals, and how much ongoing maintenance you are willing to do. The table below compares the leading approaches so you can match one to your situation.
| Method | Best For | Speed | Longevity | Effort Level |
|---|---|---|---|---|
| Non-selective herbicide | Heavy infestations, deep-rooted grass | Fast | Medium (needs retreatment) | Low |
| Horticultural vinegar | Small, young weeds on sunny days | Fast | Low (repeat applications) | Low to medium |
| Manual pulling and hoeing | Light infestations, isolated clumps | Slow | Low | High |
| Flame weeding (torch) | Gravel surfaces with dry weeds | Medium | Medium | Medium |
| Landscape fabric barrier | New driveways or full resurfacing | Slow (installation) | High | High upfront, low later |
| Boiling water | Spot treatment on small weeds | Medium | Low | Low |
If you want a broader comparison of spray-on products, our guide to the best way to get rid of weeds in a gravel driveway covers additional product categories and application timing. For driveways where grass has aggressively taken over, the strategies in how to kill grass in a gravel driveway focus specifically on root-level elimination.
Chemical and Natural Herbicide Options
Herbicides remain the fastest route to a clean driveway, but the label and the active ingredient determine how safely you can use them around a home. Non-selective products kill any plant they contact, so precision matters. Natural alternatives are safer for pets and nearby garden beds but usually require repeat applications.
Non-Selective Herbicide mid-range
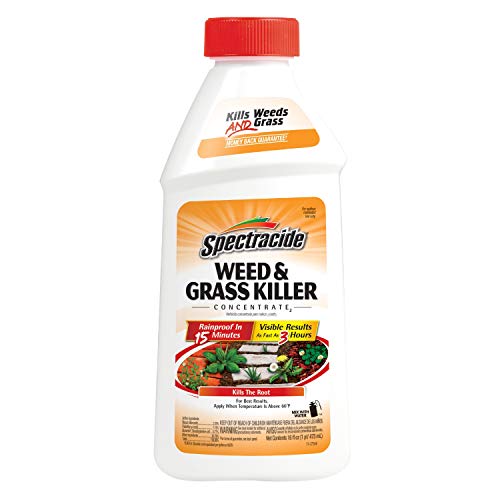
Products containing glyphosate or glufosinate are the standard for driveway weed control. They are absorbed through the foliage and travel to the roots, which makes them effective against deep-rooted grasses. Apply on a calm, dry day when rain is not expected for at least six hours. A surfactant helps the solution cling to waxy leaves.
Horticultural Vinegar (20% Acetic Acid) budget-friendly
Concentrated vinegar burns the foliage on contact and is a popular natural option for gravel. It works best on young, small weeds in full sun. Established perennials often regrow from the root, so plan on a second or third pass. Household vinegar at 5% is too weak to be reliable.
Pre-Emergent Herbicide mid-range
Pre-emergent products stop seeds from germinating rather than killing existing plants. They are the backbone of a long-term prevention plan. Apply in early spring before soil temperatures rise and again in late summer where warm-season weeds are a problem. Granular formulas are easiest to broadcast over gravel.
For homeowners who prefer to avoid synthetic chemicals entirely, our roundup of the best organic weed killer that won't kill grass reviews natural formulations that are safer for surrounding turf. If you are also dealing with weeds creeping into adjacent lawn areas, the best spray weed killer that won't kill grass offers selective options worth comparing.
Manual and Mechanical Removal Methods
Manual removal is labor-intensive but gives you instant, chemical-free results. It is the right choice for small driveways, isolated weed clusters, or households with pets and children who play near the driveway. The key is to remove the root, not just the top growth, and to disturb as little gravel as possible.
Tools That Make Manual Removal Practical
- Gravel rake: A stiff-tined rake pulls weeds and loosens compacted stone without displacing the whole surface.
- Loop hoe or oscillating hoe: Slices through shallow roots with a push-pull motion and works well between stones.
- Weeding knife or fishtail weeder: Ideal for deep-rooted dandelions and thistles that snap off at the surface.
- Stand-up weed puller: Saves your back on large driveways and grabs the root in one motion.
- Shop vacuum or leaf blower: Removes loose seeds and debris after pulling, reducing immediate regrowth.
Flame Weeding
A propane torch kills weeds by rupturing cell walls with intense heat. It works best on dry, sunny days when weeds are small. You do not need to burn the plant to ash; a few seconds of contact is enough to kill the crown. Keep a water source nearby and never use a torch on dry grass or near combustible mulch.
Boiling Water
Pouring boiling water directly on the crown of a weed kills it within a day or two. This is a useful spot treatment for driveways where a single dandelion appears, but it is impractical for large areas. It is completely chemical-free and safe for pets once cooled.
Step-by-Step Plan to Clear a Weed-Filled Gravel Driveway
Follow this sequence for the most reliable results. It moves from immediate knockdown to long-term prevention, which is the same order professional landscapers use on residential driveways.
- Assess the surface and sub-base. Walk the driveway and note where weeds are densest. If the gravel is thin or the fabric is torn, plan to top-dress or repair the barrier after removal.
- Remove loose debris and seeds. Blow or sweep the surface before treatment so herbicides and heat reach the weed crowns directly.
- Apply a non-selective herbicide or horticultural vinegar. Spot-treat visible weeds on a calm, dry day. Wait for the recommended interval before pulling dead tops.
- Pull or hoe remaining roots. Once the tops are dead, use a weeding knife or loop hoe to remove crowns and roots that survived.
- Refresh the gravel layer. Add 3 to 4 inches of fresh crushed stone over low spots to bury surviving seeds and smother regrowth.
- Apply a pre-emergent. Broadcast a granular pre-emergent in early spring and again in late summer to stop the next wave of germination.
- Monitor and spot-treat. Walk the driveway every two to three weeks and remove any new weeds before they flower and set seed.
If the infestation is severe and the gravel layer is thin, a full reset with a woven fabric barrier may be the better investment. Our detailed guide to the best way to kill grass and weeds in a gravel driveway walks through the reset process step by step, including fabric selection and gravel depth.
Long-Term Prevention: Stop Weeds Before They Start
Removal is only half the job. A gravel driveway stays clean when you attack the conditions that let weeds establish in the first place. The strongest prevention plans combine a physical barrier, proper gravel depth, and seasonal pre-emergent applications.
Install a Heavy-Duty Woven Landscape Fabric
Non-woven fabrics tear and shift under vehicle traffic. A woven, commercial-grade fabric with high tensile strength blocks sunlight and prevents seeds from reaching the soil underneath. Install it over a compacted, graded sub-base with overlapping seams, then cover it with at least 3 inches of gravel.
Maintain Gravel Depth
Thin gravel exposes the fabric and lets dust accumulate, which creates a new seedbed. Top-dress annually with crushed stone and rake it evenly. A consistent 3- to 4-inch layer is thick enough to suppress most weed growth and still comfortable to drive on.
Use Pre-Emergent on a Schedule
Mark your calendar for early spring and late summer. Applying a granular pre-emergent before weed seeds germinate is the single highest-impact maintenance task you can do. It is also far easier than pulling mature weeds later.
Keep Edges and Transitions Clean
Weeds often invade from the sides where gravel meets soil or lawn. Maintain a clean, sharp edge with a string trimmer or edging tool, and consider a narrow strip of dense ground cover or a mowing strip to create a buffer zone.
For lawn-adjacent areas where weeds creep in from the grass, the best way to get rid of grass in a gravel driveway covers edge-control techniques that stop the spread without damaging your turf. If you are also fighting weeds between hardscape surfaces, the guide to the best way to get rid of weeds between patio stones shares overlapping prevention principles.
Common Mistakes That Let Weeds Win
- Pulling only the tops. Dandelions and thistles regrow from root fragments. Always remove the crown and as much taproot as possible.
- Spraying on a windy day. Herbicide drift can damage nearby garden beds and lawn. Choose a calm morning when rain is not forecast.
- Skipping pre-emergent. Relying on removal alone means you are fighting the same seed bank every season. Prevention is the real solution.
- Using too little gravel. A thin layer dries fast but also lets light through and creates dust. Keep the depth consistent.
- Ignoring torn fabric. A small rip in the barrier becomes a weed highway. Repair or replace damaged sections before topping with new stone.
- Letting weeds go to seed. One dandelion can release hundreds of seeds. Remove or treat new weeds while they are small.
Frequently Asked Questions
What is the fastest way to kill weeds in a gravel driveway?
A non-selective herbicide containing glyphosate or glufosinate is the fastest method for large areas because it kills roots and tops. Apply it on a dry, calm day and avoid rain for at least six hours. For small driveways or households avoiding chemicals, horticultural vinegar or flame weeding are fast alternatives, though they often require repeat applications.
Does vinegar really work on gravel driveway weeds?
Horticultural vinegar at 20% acetic acid works well on small, young weeds in full sun. It burns foliage quickly and kills shallow-rooted plants. Deep-rooted perennials may regrow, so plan on several applications. Household vinegar at 5% is too weak to be dependable.
Should I put landscape fabric under my gravel driveway?
Yes. A heavy-duty woven fabric blocks sunlight, prevents seeds from reaching the soil, and stabilizes the sub-base. It is especially valuable on new driveways or when you are resurfacing an old one. Repair any tears before adding new gravel.
How do I stop weeds from coming back after removal?
Apply a pre-emergent herbicide in early spring and late summer, keep the gravel layer at least 3 to 4 inches deep, and remove any new weeds before they flower. These three habits form a prevention loop that dramatically reduces regrowth. For natural options, our guide to the best natural weed killer that won't kill grass reviews safer alternatives.
Is salt safe to use on gravel driveway weeds?
Salt can kill weeds, but it also contaminates soil, can damage nearby plants, and may corrode concrete or metal edging. It is not recommended for most residential driveways. Targeted herbicides, horticultural vinegar, or boiling water are safer choices.
How often should I treat my gravel driveway for weeds?
Spot-treat visible weeds every two to three weeks during the growing season. Apply pre-emergent twice a year, in early spring and late summer. A quick walk-through with a rake or blower once a week keeps seeds from settling and makes larger treatments less frequent.
Ready to Reclaim Your Gravel Driveway?
Choose the method that fits your comfort level, follow the step-by-step plan, and commit to a prevention schedule. A clean driveway is not just about appearance; it protects the surface and saves you hours of work later.
Shop Recommended Tools & Supplies