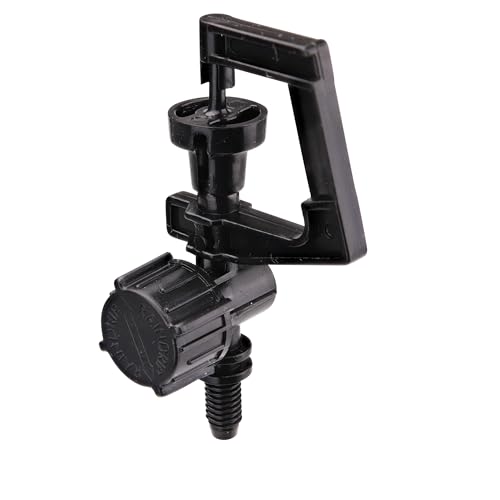
Installing Drip Irrigation on an Existing Sprinkler System
A complete, step-by-step guide to upgrading your garden's watering system for efficiency, water conservation, and healthier plants.
Why Convert Your Sprinkler System to Drip Irrigation?
Converting an existing sprinkler system to drip irrigation is one of the most impactful upgrades you can make for your garden. Traditional sprinklers are inefficient, losing up to 50% of water to evaporation, runoff, and overspray. Drip irrigation delivers water directly to the root zone of plants, minimizing waste and promoting deeper, healthier root growth.
Whether you're a seasoned gardener or just starting out, this guide will walk you through the entire process—from planning and parts selection to installation and testing. By the end, you'll have a highly efficient system that saves water, time, and money.
Key Benefits of Drip Irrigation Conversion
💧 Water Savings
Reduce water usage by up to 60% compared to traditional sprinklers.
🌱 Healthier Plants
Deliver water directly to the root zone, preventing fungal diseases and promoting strong root systems.
⏱️ Less Maintenance
Fewer weeds, no overspray on walkways, and no need to move sprinklers around.
💰 Cost-Effective
Lower water bills and reduced plant replacement costs make this a smart investment.
Step-by-Step Installation Guide
Follow these steps to successfully install drip irrigation on your existing sprinkler system. The process is straightforward and can be completed in a weekend.
-
Step 1: Plan Your Drip System Layout
Start by mapping out your garden beds and identifying the plants you want to irrigate. Determine the flow rate (GPM) and pressure (PSI) of your existing sprinkler system. Drip systems typically operate at 20-40 PSI. If your system exceeds this, you'll need a pressure regulator.
Sketch your layout, noting the length of tubing needed and the placement of emitters. Group plants with similar water needs on the same zone to maximize efficiency.
-
Step 2: Gather Materials and Tools
For this project, you'll need a drip irrigation conversion kit or individual components: mainline tubing (1/2" or 3/4"), emitter tubing, emitters, drip stakes, connectors, a backflow preventer, a pressure regulator, and a filter. Tools include a tubing cutter, hole punch, and a shovel for any trenching required.
Pro Tip: Choose a kit that matches the size of your garden. For smaller areas, a pre-assembled kit simplifies the process. For larger projects, buying components separately offers more flexibility. -
Step 3: Shut Off Water and Prepare the Zone
Turn off the water supply to your irrigation system. Remove the existing sprinkler head from the zone you're converting. This is where you'll attach your new drip system. If you're converting multiple zones, repeat this process for each one.
Clean the area around the connection point to ensure a good seal.
-
Step 4: Install the Backflow Preventer and Filter
Screw the backflow preventer onto the sprinkler riser. This prevents contaminated water from flowing back into your clean water supply. Next, attach a filter to catch debris that could clog emitters. Both are essential for the longevity of your drip system.
-
Step 5: Install the Pressure Regulator
Attach the pressure regulator after the filter. This reduces the water pressure to a level safe for drip irrigation (usually 20-40 PSI). Most standard sprinkler systems operate at higher pressures, making this step critical.
If you're connecting to a zone with a valve, you can install all these components directly after the valve.
-
Step 6: Run the Mainline Tubing
Connect the mainline tubing (1/2" or 3/4") to the pressure regulator and route it to your garden beds. You can lay it on the surface or bury it just below the soil. For a neat appearance, consider burying the tubing under a few inches of mulch.
Use stakes to hold the tubing in place. Secure the end of the mainline with a flush valve or end cap.
-
Step 7: Install Emitter Tubing and Emitters
Connect the emitter tubing (1/4") to the mainline using a barbed tee or connector. Run the emitter tubing to individual plants. At each plant, use a hole punch to make a small hole in the mainline or emitter tubing and insert a drip emitter or drip stake.
Emitters come in various flow rates (0.5, 1, or 2 GPH). Choose a rate that matches your plant's water needs. For shrubs and trees, use a higher flow rate; for flowers and vegetables, a lower rate is often sufficient.
Pro Tip: For a raised bed system, you can use a grid pattern of emitter tubing with built-in emitters spaced every 6-12 inches. -
Step 8: Flush and Test the System
Before closing everything up, flush the system to remove any debris that may have entered during installation. Turn on the water for a few minutes and let it flow through the open ends of the tubing. Once clear, cap the ends.
Check each emitter to ensure it's working correctly. Adjust as needed. This is also a great time to check for leaks at all connections.
-
Step 9: Set Up Your Timer or Controller
If your existing system has a timer, you can use it to control the drip zone. Drip irrigation typically requires longer watering times than sprinklers. Adjust the run time accordingly—often 45 minutes to an hour per zone, 2-3 times a week, depending on your climate and plant needs.
Consider adding a smart irrigation controller that adjusts watering based on weather conditions to maximize efficiency.
Enjoy the Benefits of Your New Drip System
After completing your installation, you'll enjoy a more efficient, water-wise garden. Your plants will thrive with consistent moisture directly at their roots, and you'll notice the savings on your water bill almost immediately.
Need more inspiration or tips? Check out our guides on gardening tips, landscaping, and outdoor living to create your dream garden.
Remember, a well-installed drip irrigation system is a long-term investment in your garden's health and your property's value. Happy gardening!