How to Take Care of Aloe Vera Plant Outdoors
Your complete guide to growing thriving aloe vera plants in your garden or patio. Learn the secrets to healthy, vibrant aloe that produces gel and pups year after year.
JUMP TO CARE TIPSLet Gardening Guide: Aloe vera is a resilient, sun-loving succulent that thrives outdoors in warm climates. With the right care—proper sunlight, well-draining soil, and infrequent watering—your outdoor aloe will reward you with lush, medicinal leaves and new offshoots. This guide covers everything you need to know to keep your aloe healthy and happy in your garden.
🌞 Sunlight Needs
Aloe vera loves bright, indirect sunlight. In most regions, morning sun with afternoon shade is ideal. Too much direct afternoon sun can scorch leaves, while too little light causes leggy growth.
💧 Watering Schedule
Water deeply but infrequently. Allow the soil to dry completely between waterings. In hot weather, water every 2–3 weeks; in cooler months, reduce to once a month. Overwatering is the #1 killer of aloe.
Complete Outdoor Aloe Vera Care Guide
1. Sunlight & Location: Finding the Perfect Spot
Outdoor aloe vera performs best in a location that receives bright, filtered light for most of the day. In coastal or mild climates, full sun is acceptable, but in hot inland areas, afternoon shade prevents leaf burn. A spot under a tree, on an east-facing patio, or near a south-facing wall with some shade works wonderfully.
If you live in USDA zones 9–11, aloe can stay outdoors year-round. In cooler zones, plant in a container so you can move it indoors when temperatures drop below 40°F.
Pro tip: Rotate your potted aloe occasionally so all sides receive equal light and growth stays balanced.
Learn more about how much light an aloe vera plant needs for optimal growth.
2. Soil & Drainage: The Foundation of Health
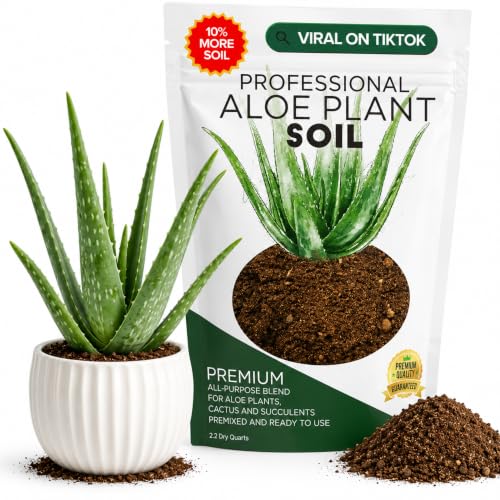
Aloe vera requires well-draining soil to prevent root rot. A cactus/succulent potting mix is ideal. If planting in the ground, amend heavy clay soil with coarse sand, perlite, or pumice to improve drainage. The soil pH should be slightly acidic to neutral (6.0–7.0).
When planting in containers, ensure the pot has drainage holes. A terracotta pot is excellent because it wicks away excess moisture. Avoid using saucers that hold water.
Essential: Never let your aloe sit in water. Soggy roots are the quickest way to kill the plant.
For detailed guidance, check our article on what soil to use to repot an aloe vera plant.
3. Watering Routine: Less is More
Aloe is a succulent that stores water in its fleshy leaves. Overwatering is far more dangerous than underwatering. The "soak and dry" method works best: water thoroughly until it drains from the bottom, then wait until the top 2–3 inches of soil are completely dry before watering again.
During hot, dry spells, you may need to water every 10–14 days. In winter or cooler weather, reduce watering to every 3–4 weeks. Signs of overwatering: soft, mushy, or yellowing leaves. Signs of underwatering: thin, curled, or wrinkled leaves.
Remember: When in doubt, don't water. Aloe can survive long periods of drought better than excess moisture.
Find more tips on how often to water an indoor aloe vera plant (similar principles apply outdoors).
4. Fertilizing: Feed for Growth
Aloe vera doesn't need heavy feeding. Apply a balanced, water-soluble fertilizer (10-10-10 or 5-10-5) diluted to half strength once in early spring and again in mid-summer. Over-fertilizing can cause leggy, weak growth and may burn the roots.
For organic options, use compost tea or worm castings. Avoid high-nitrogen fertilizers, as they encourage soft growth that's more prone to pests.
Pro tip: If your aloe is planted in the ground with rich soil, you may not need to fertilize at all—just top-dress with compost annually.
5. Pruning & Maintenance: Keep It Tidy
Outdoor aloe plants require minimal pruning. Remove dead, damaged, or diseased leaves at the base using clean, sharp shears. This improves airflow and reduces pest risk. You can also trim off older outer leaves to encourage new growth from the center.
If your aloe produces pups (baby plants), you can separate them in spring and repot or transplant them to new locations. This is a great way to expand your aloe collection or share with friends.
Note: Always wear gloves when handling aloe, as the sap can be mildly irritating to some skin.
6. Pests & Diseases: Prevention and Treatment
Outdoor aloe is generally pest-resistant, but it can occasionally attract mealybugs, aphids, or scale. Inspect your plant regularly, especially under leaves and in crevices. Treat minor infestations with a cotton swab dipped in rubbing alcohol or a gentle spray of insecticidal soap.
Fungal diseases like root rot and leaf spot are almost always caused by overwatering or poor drainage. If you notice dark, mushy spots, reduce watering immediately and improve soil drainage. In severe cases, you may need to repot with fresh, dry soil.
Prevention: Keep the area around your aloe clean and dry, and avoid splashing water on the leaves when watering.
For natural pest solutions, see our guide on natural weed and pest control methods.
7. Winter Care: Protecting Aloe from Cold
If you live in a region with freezing winters, you must protect your aloe. Temperatures below 40°F can damage or kill the plant. Options include:
- Plant in containers so you can move them indoors or into a garage during cold snaps.
- Cover with frost cloth or burlap when frost is forecast.
- Apply mulch around the base (but not touching the leaves) to insulate the roots.
In mild winter areas (zone 9+), aloe can remain outside but may need occasional cover during unusual cold spells.
✅ Quick Aloe Care Checklist
- Provide bright, indirect light (morning sun + afternoon shade)
- Use well-draining cactus/succulent soil
- Water deeply but only when soil is completely dry
- Fertilize lightly once or twice during growing season
- Remove dead leaves and separate pups in spring
- Protect from frost and heavy rain
- Inspect regularly for pests