Automatic Drip Irrigation System for Home Gardening
Stop dragging hoses. Start growing stronger plants. Learn how an automatic drip irrigation system delivers water exactly where roots need it — consistently, efficiently, and without waste.
SEE RECOMMENDED SYSTEMSWhy this guide matters: If you are researching automatic drip irrigation systems, you already know you want a smarter way to water. What you likely still need to confirm is which system fits your garden, how complex installation really is, and whether the investment genuinely pays off over time. This guide answers those questions in plain language so you can choose with confidence.
What Is an Automatic Drip Irrigation System?
An automatic drip irrigation system is a low-pressure watering network that delivers water directly to the root zone of each plant through flexible tubing and small emitters. A timer or controller automates the schedule, so water flows at set times without you lifting a finger. Unlike overhead sprinklers that spray water into the air, drip systems place water precisely at the soil surface near the roots.
This matters because up to half the water from sprinklers can be lost to evaporation, wind drift, and runoff. Drip irrigation eliminates most of that waste. It also keeps foliage dry, which reduces fungal disease pressure on vegetables, flowers, and shrubs. If you are building a raised-bed garden, pairing a dedicated kit with a system designed specifically for raised beds makes the setup even more effective.
Key Components of a Home Drip Irrigation System
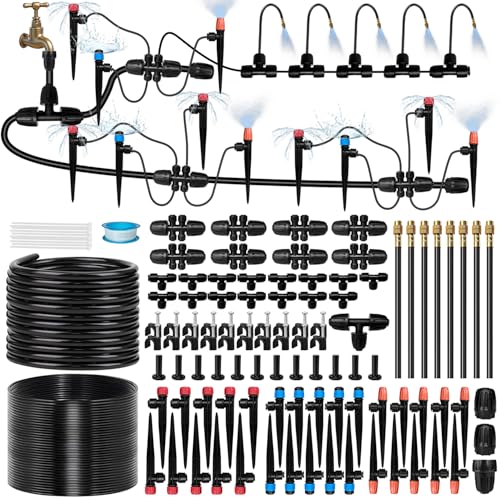
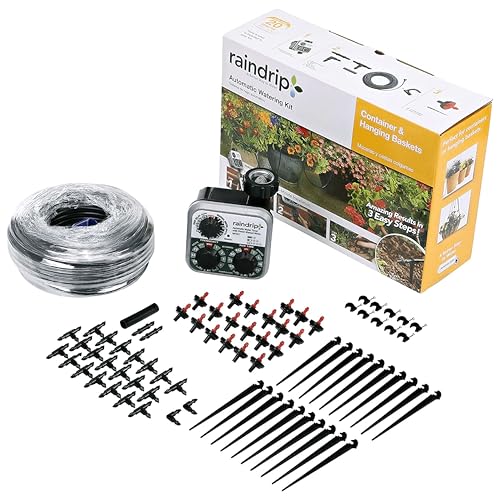
Every automatic drip system shares the same core components. Understanding them helps you evaluate kits and plan your own layout.
- Water source connection — typically an outdoor faucet with a backflow preventer, or a tap into an existing sprinkler line.
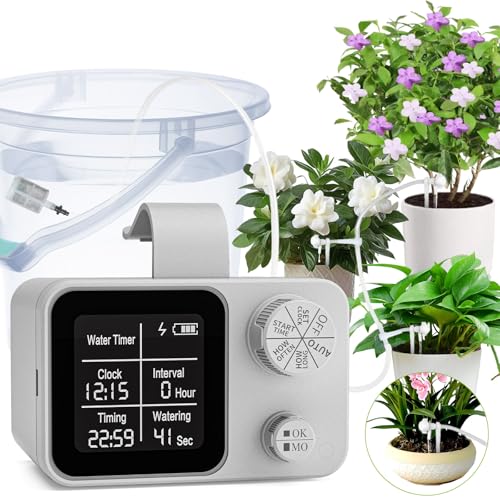
- Timer / controller — battery-powered or smart Wi-Fi controllers that open and close valves on schedule. Smart controllers can adjust based on weather.
- Pressure regulator — keeps water pressure in the safe range (usually around 25–30 PSI) so emitters work correctly and tubing does not burst.
- Filter — screens out debris that would clog emitters. Essential for long-term reliability.
- Mainline tubing — the primary distribution line, commonly 1/2-inch diameter.
- Drip line or emitter tubing — thinner tubing (1/4-inch) or inline emitter tubing that runs along plant rows.
- Emitters — the tiny outlets that release water at a controlled rate. Available as inline, barbed, or adjustable types.
- Fittings and stakes — connectors, tees, elbows, and ground stakes to hold tubing in place.
If you already have an in-ground sprinkler system, you can often add a drip zone rather than starting from scratch. Our guide on adding drip irrigation to an existing sprinkler system walks through that process step by step.
Why Home Gardeners Choose Automatic Drip Irrigation
The advantages go beyond convenience. Here is what consistent, root-level watering actually does for your garden:
- Water savings of 30–50% compared to sprinklers, according to common industry estimates, because water goes to roots, not pavement or air.
- Healthier plants — steady moisture prevents the stress of wet-dry cycling and keeps foliage dry to reduce disease.
- Time savings — a timer handles watering while you are at work or away for the weekend.
- Weed suppression — water only reaches your intended plants, so weed seeds between rows stay dry.
- Works on slopes and in odd shapes — drip tubing can be routed around curves and contours where sprinklers struggle.
- Scalable — start with a single bed and expand zone by zone as your garden grows.
Types of Automatic Drip Systems: Which Fits Your Garden?
Drip irrigation kits generally fall into three tiers based on complexity and control. Use the table below to match a tier to your situation.
| System Tier | Best For | Key Traits |
|---|---|---|
| Entry-level | Single raised bed or small herb garden | Battery timer, basic 1/4-inch tubing, fixed-rate emitters, manual faucet connection |
| Mid-range | Multiple beds, mixed vegetables and flowers | Programmable timer, pressure regulator and filter included, adjustable emitters, expansion fittings |
| Premium | Large gardens, multi-zone landscapes | Smart Wi-Fi controller with weather adjustments, multiple zones, inline emitter tubing, premium fittings |
For most home gardeners with two to four raised beds, a mid-range kit offers the best balance of control and simplicity. Entry-level kits are genuinely capable for a single bed, while premium systems make sense when you want zone-by-zone scheduling or plan to expand significantly. If you are also automating container plants on a patio, a separate automatic watering system for outdoor potted plants can complement your in-ground drip setup.
How Installation Works (and How Hard It Really Is)
Most homeowners complete a basic drip installation in an afternoon. The process follows a predictable sequence:
- Step 1: Connect at the faucet. Attach the backflow preventer, timer, pressure regulator, and filter in that order.
- Step 2: Run the mainline. Lay 1/2-inch tubing from the faucet toward your garden beds, securing it with stakes.
- Step 3: Branch to plant rows. Use tees and barbed fittings to run 1/4-inch drip line to each row or individual plant.
- Step 4: Install emitters. Punch holes and insert emitters, or use inline emitter tubing with pre-spaced outlets.
- Step 5: Flush and test. Run the system briefly to flush debris, then check that every emitter releases water evenly.
- Step 6: Set the schedule. Program the timer for early morning watering, typically two to three times per week depending on climate and soil.
The most common installation mistakes are skipping the pressure regulator (which causes blown fittings) and skipping the filter (which causes clogged emitters). Both are inexpensive components that prevent most headaches. If you are expanding an existing system rather than starting fresh, the process of adding a drip line to an existing irrigation system follows similar steps but begins at a valve rather than a faucet.
How to Choose the Right System for Your Garden
Before comparing kits, answer four practical questions:
- How many zones do you need? A zone is an area watered on one schedule. Vegetable beds, flower borders, and containers often need different watering frequencies, so separate zones help.
- What is your water pressure? Most homes run 40–80 PSI at the faucet. Drip systems need roughly 25–30 PSI, which is why a pressure regulator is standard.
- How many plants and what spacing? Inline emitter tubing with 12-inch or 18-inch spacing suits row crops. Individual emitters suit widely spaced shrubs and perennials.
- Do you want smart control? Wi-Fi controllers that adjust for rainfall and temperature are worth considering if you travel often or garden in a variable climate.
Also consider how the system integrates with your broader watering plan. If you are weighing drip against traditional sprinklers, our overview of the average cost of a lawn irrigation system installed gives useful context on how professionals scope and price whole-yard systems, which helps you judge the relative value of a DIY drip kit.
Keeping Your Drip System Running Reliably
Drip systems are low-maintenance but not zero-maintenance. A short seasonal routine prevents most problems:
- Flush the lines at the start and end of each growing season by removing end caps and running water through.
- Clean or replace the filter every few weeks during heavy use.
- Check emitters monthly for clogs; adjustable emitters can often be opened to clear debris.
- Inspect tubing after storms for kinks, cuts, or disconnected fittings.
- Drain and store removable components before freezing weather if your system is above ground.
With basic care, quality drip components last many seasons. The timer is usually the first component to need attention — battery contacts corrode, or programming drifts. Keeping a spare battery on hand and checking the schedule at each season change is usually sufficient.
Frequently Asked Questions
Can I connect a drip system to a rain barrel?
Yes, but you will need a pump or a gravity-fed setup with sufficient elevation. Standard drip systems require about 25 PSI, which gravity alone rarely provides from a barrel. Low-pressure drip emitters designed for gravity systems are available for this use case.
Will drip irrigation work for lawns?
Yes, subsurface drip irrigation is used for lawns, though it is installed differently than garden drip — tubing is buried below the root zone. For most homeowners, surface drip is best reserved for beds, borders, and containers, while lawns use sprinklers or subsurface drip installed by a professional.
How often should I run the system?
In most climates, two to three deep waterings per week during the growing season is adequate for established plants. New plantings need more frequent, shorter cycles. Adjust based on soil type: sandy soil drains faster and may need more frequent cycles, while clay soil holds water longer.
Do I need a pressure regulator and filter?
Yes, always. The regulator protects tubing and fittings from excess pressure, and the filter prevents emitter clogs. Both are inexpensive and are included in most quality mid-range and premium kits.
Can I expand a starter kit later?
Yes. Drip systems are modular. You can add tubing runs, emitters, and additional zones as your garden grows. Just keep total flow within the capacity of your timer and water source.
Ready to Automate Your Garden Watering?
Browse recommended automatic drip irrigation systems and components below. Every kit is selected for home gardeners who want reliable, water-saving performance without a professional installation.
VIEW RECOMMENDED SYSTEMS