How Do I Take Care of an Aloe Vera Plant – Complete Guide
Master aloe vera care: watering, sunlight, soil, repotting, and harvesting. Keep your aloe thriving indoors or outdoors with these expert tips.
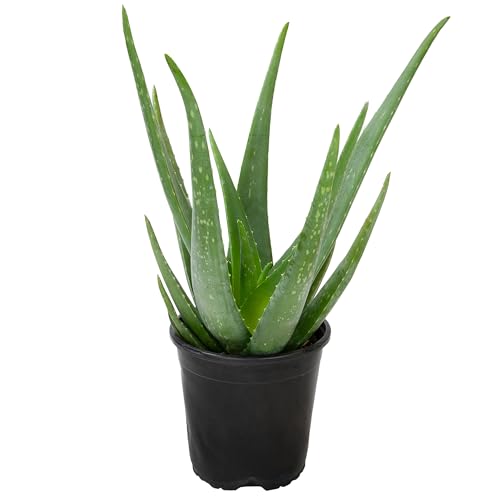
Jump to Care SummaryAloe vera is one of the most popular and rewarding succulents to grow at home. Not only does it offer a striking architectural form, but its gel is also renowned for soothing skin irritations and burns. If you’ve ever wondered, “how do I take care of a aloe vera plant?” – you’re in the right place. This guide covers everything from watering schedules to soil mixes, light requirements, and even how to harvest aloe gel without harming the plant.
🌿 Aloe Vera Care at a Glance:
- Light: Bright, indirect sunlight (or 4–6 hours of direct morning sun).
- Water: Deep watering only when the soil is completely dry (typically every 2–3 weeks).
- Soil: Well-draining succulent/cactus mix (or DIY: 1 part potting soil + 1 part perlite/pumice).
- Temperature: 60–80°F (15–27°C); protect from frost.
- Fertilizer: Light feeding once in spring with a balanced liquid fertilizer (diluted to half strength).
- Repotting: Every 2–3 years or when roots outgrow the pot.
1. Light Requirements for Aloe Vera
Aloe vera plants are native to arid regions, so they love bright light. However, too much direct afternoon sun can scorch their leaves, turning them brown or yellow. The ideal spot is a south- or west-facing window where the plant receives bright, indirect light for most of the day, with a few hours of direct morning sun.
If you notice the leaves becoming pale or leggy (stretching toward the light), it’s a sign that your aloe needs more light. Conversely, if the leaves develop brown spots or a reddish tint, it may be getting too much intense sun. Gradually acclimate your plant to brighter conditions to avoid shock. For indoor growing, aloe is a pet-friendly option – just ensure it gets enough light.
2. Watering Aloe Vera – The Golden Rule
The most common mistake when caring for aloe is overwatering. Aloe is a succulent that stores water in its thick leaves, so it prefers to dry out completely between waterings. The golden rule: water deeply, but infrequently. Wait until the top 2–3 inches of soil are bone-dry before watering again – this could be every 2 to 3 weeks, depending on your climate and indoor conditions.
When you water, soak the soil thoroughly until water drains from the bottom of the pot. Empty the saucer after a few minutes to prevent the roots from sitting in water, which can lead to root rot. During winter, reduce watering even further – once a month is often sufficient. If you’re unsure, it’s always safer to underwater than overwater. For more tips on succulent care, check out our succulent care guide.
💧 Pro Tip: The leaves of a well-hydrated aloe will be plump and firm. If they start to look thin, wrinkled, or curled, it’s a sign your plant is thirsty. If they become soft, mushy, or translucent, you’ve overwatered – act quickly to repot in dry soil.
3. Best Soil and Potting Mix
Aloe vera requires well-draining soil to thrive. A commercial cactus or succulent mix is ideal. You can also make your own by combining equal parts of regular potting soil, coarse sand, and perlite or pumice. This mix allows excess water to drain quickly, preventing root rot.
Choose a pot with a drainage hole – terracotta or unglazed clay pots are excellent because they wick away moisture. The pot should be just slightly larger than the root ball; aloe prefers to be slightly root-bound. Repot every 2–3 years or when you see roots growing out of the drainage holes. For more on choosing the right container, see our indoor plant care tips.
4. Temperature and Humidity
Aloe vera is a warm-weather plant that thrives between 60–80°F (15–27°C). It cannot tolerate frost, so if you live in a cold climate, keep your aloe indoors or bring it inside before the first frost. In summer, you can move it outdoors, but gradually acclimate it to prevent sunburn.
Humidity is rarely a concern for aloe; it adapts well to average indoor humidity levels. However, good air circulation is beneficial to prevent fungal issues. Avoid placing your aloe near drafty windows, air conditioners, or heating vents that can cause sudden temperature fluctuations.
5. How to Fertilize Aloe Vera
Aloe vera is a light feeder and doesn’t require much fertilizer. Over-fertilizing can cause leggy growth and burn the roots. Feed your aloe once in early spring with a balanced, water-soluble fertilizer diluted to half strength. A 10-10-10 or 5-10-5 formula works well. Avoid fertilizing in fall and winter when the plant is dormant.
If you prefer organic options, you can top-dress with a thin layer of compost or worm castings in spring. For more on natural plant nutrition, visit our plant fertilizer guide.
6. Repotting and Propagating Aloe
Aloe vera produces pups (small offshoots) that grow around the base of the mother plant. You can separate these pups and pot them individually to grow new aloe plants. The best time to repot or propagate is in spring or early summer.
To repot, carefully remove the aloe from its pot, gently shake off old soil, and inspect the roots. Trim any dead or rotting roots with sterile scissors. Place the plant in a new pot with fresh soil, and wait a few days before watering to allow the roots to heal. Propagating pups is simple: cut the pup with a clean knife, let it callous for a day, then plant it in its own pot with succulent mix.
For more propagation techniques, see our plant propagation guide.
7. How to Harvest Aloe Vera Gel
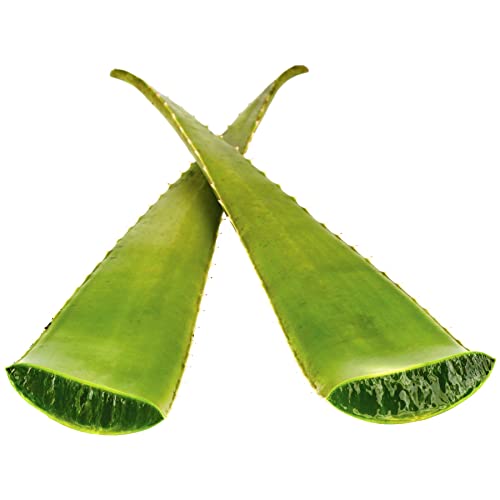
One of the best reasons to grow aloe vera is to harvest its soothing gel. To harvest, choose a mature, outer leaf (at least 3–4 inches long). Cut the leaf as close to the base as possible with a sharp, clean knife. Let the cut end sit for a few minutes to drain the yellow latex (which can be irritating to the skin), then rinse the leaf.
Slice the leaf lengthwise and scoop out the clear gel with a spoon. Use it immediately for skin care, or store it in an airtight container in the refrigerator for up to a week. Never harvest more than one-third of the plant’s leaves at a time to ensure it continues to grow healthy.
8. Troubleshooting Common Aloe Problems
- Brown or yellow leaves: Often caused by too much direct sun or overwatering. Move to a shadier spot and adjust watering.
- Soft, mushy leaves: Classic sign of overwatering. Stop watering immediately and consider repotting in dry soil.
- Thin, curling leaves: Indicates thirst. Give the plant a deep watering and monitor soil moisture.
- Leggy growth: Not enough light. Move to a brighter location.
- Pests (mealybugs, scale): Wipe with a cotton swab dipped in rubbing alcohol or use insecticidal soap.
9. Frequently Asked Questions
How often should I water my aloe vera?
Water only when the soil is completely dry – usually every 2–3 weeks in summer, and once a month in winter.
Can aloe vera survive in low light?
Aloe prefers bright, indirect light. It may survive in lower light, but growth will be slow and leggy.
What is the best soil for aloe vera?
A well-draining succulent mix (potting soil + perlite/pumice) is ideal.
Is aloe vera safe for pets?
Aloe vera is moderately toxic to cats and dogs if ingested. Keep it out of reach of pets.
How do I propagate aloe vera?
Separate the pups from the mother plant and plant them in fresh soil. Let them callous for a day before watering.
Final Thoughts
Caring for an aloe vera plant is simple once you understand its needs. Remember: bright light, infrequent watering, and well-draining soil are the keys to a happy, healthy aloe. Whether you keep it on your windowsill, patio, or garden, this resilient succulent will reward you with its beauty and healing gel for years to come.
Explore more: How to take care of a small aloe vera plant | Best way to take care of aloe vera | How to take care of aloe indoors | Proper aloe care guide