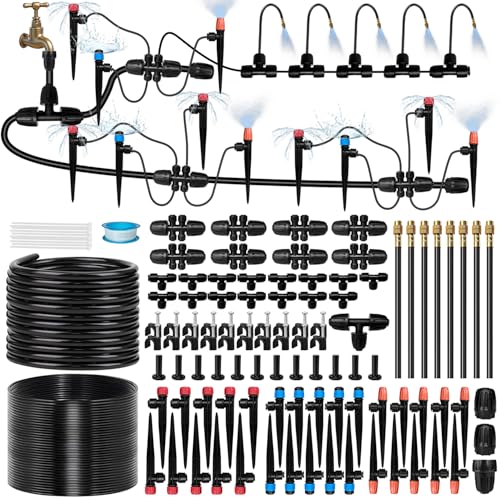
What Is a Gravity Fed Drip Irrigation System?
A gravity fed drip irrigation system is a passive watering method that relies on the natural pull of gravity — rather than an electric pump — to move water from an elevated reservoir through drip lines and emitters. You fill a tank, barrel, or container positioned above the garden, and gravity pushes water down into the irrigation tubing where it drips slowly at the base of each plant.
For raised beds, this approach is especially appealing because the beds themselves create an ideal physical setup: you can place a water barrel or tank at one end, run drip lines across the soil surface, and let the system do the rest. There are no power cords, no noisy pumps, and no complicated timers required — though a simple battery-operated timer can be added for extra convenience.
Unlike sprinkler systems that spray water into the air and lose much of it to evaporation, a gravity drip system delivers moisture directly to the root zone. This makes it one of the most water-efficient irrigation methods available for home gardeners, and it pairs naturally with the controlled environment of a raised bed. If you're also exploring other passive watering approaches, our guide on the drip irrigation system covers broader options worth reviewing.
How Gravity Drip Irrigation Works
The physics behind a gravity fed system is straightforward: water seeks its lowest level. When you elevate a reservoir above the height of your drip lines, the water gains potential energy that converts into pressure as it flows downward. The greater the height difference between the water surface and the emitters, the more pressure the system generates.
As a general rule, every 2.3 feet of elevation creates approximately 1 PSI of pressure. Most drip irrigation components — particularly pressure-compensating emitters — operate well within the 1 to 5 PSI range that a typical elevated rain barrel or tank can provide. This is one reason gravity systems are so practical for raised beds: the bed wall itself can support a stand or platform that lifts the reservoir to the necessary height.
Pressure Considerations
Because the pressure in a gravity system is relatively low and constant, the emitters must be matched to that low-pressure environment. Pressure-compensating (PC) emitters are the best choice because they maintain a consistent flow rate across the entire line — even as the water level in the reservoir drops. Without pressure compensation, plants at the beginning of the line would receive more water than those at the end.
Another factor is friction loss. The longer the tubing run and the more fittings you use, the more pressure is lost along the way. Keeping runs under about 30 feet and using larger-diameter mainline tubing helps preserve pressure. If your raised bed layout is complex or spread out, you may need to raise the tank slightly higher or split the system into multiple zones.
Key Benefits of Gravity Fed Drip Irrigation for Raised Beds
Gravity drip systems offer a unique combination of simplicity, efficiency, and low maintenance that suits raised bed gardening particularly well. Here's why so many home gardeners choose them:
No Electricity Required
Because gravity does the work, there's no pump, no wiring, and no dependence on an outdoor outlet. The system works during power outages and in remote garden areas.
Water Efficiency
Water is delivered directly to the root zone, minimizing evaporation and runoff. This is especially valuable in raised beds, where soil dries out faster than in-ground gardens.
Low Maintenance
With no moving mechanical parts, there's very little that can break. Routine flushing and occasional emitter checks keep the system running season after season.
Consistent Soil Moisture
Slow, steady drip keeps soil moisture levels stable, which reduces plant stress and supports healthier growth compared to intermittent hand watering.
Easy to Expand
Adding another raised bed or extending a line is simple — just connect more tubing and emitters to the existing setup without reworking the whole system.
Rain Barrel Friendly
Gravity systems integrate seamlessly with rain barrels, turning harvested rainwater into a free, automatic irrigation source for your beds.
Raised beds are particularly well-suited to drip irrigation because their confined soil volume and defined edges make it easy to position emitters precisely. Unlike in-ground gardens where water can spread unpredictably, a raised bed gives you control over the root zone. To explore bed construction options that pair well with drip systems, see our collection of ideas for raised garden beds and DIY garden beds.
Essential Components of a Gravity Drip System
A gravity fed drip irrigation system is made up of a handful of components that work together. Understanding each part helps you choose the right pieces and assemble a system that performs reliably.
| Component | Purpose | Selection Notes |
|---|---|---|
| Water Reservoir | Stores and supplies water; elevation creates pressure | Rain barrel, tank, or tote; must be elevated and clean |
| Bulkhead Fitting / Outlet | Connects tubing to the reservoir | Match to tubing diameter; install near the bottom |
| Inline Filter | Traps debris before it reaches emitters | Essential for rain barrels; 150–200 mesh is common |
| Mainline Tubing | Carries water from reservoir to the bed | 1/2-inch or 5/8-inch diameter; UV-resistant |
| Drip Emitters / Drip Line | Delivers water slowly at each plant | Pressure-compensating (PC) emitters work best at low pressure |
| Valve or Timer | Controls when water flows | Manual ball valve or battery-operated timer |
| End Cap / Flush Valve | Closes the line and allows flushing | Flush valve makes seasonal maintenance easier |
Choosing Emitters for Low Pressure
The emitters are the heart of any drip system, and in a gravity setup they matter even more because the available pressure is limited. Pressure-compensating emitters are strongly recommended: they deliver a consistent flow rate (commonly 0.5 to 1 gallon per hour) regardless of where they sit on the line or how full the reservoir is. Standard or turbulent-flow emitters can work in some setups but tend to produce uneven watering as the water level drops.
In addition to emitters, consider a simple inline filter and a flush valve. The filter protects the emitters from sediment and organic debris, while the flush valve lets you clear the lines at the end of the season. These small additions significantly extend the life of the system. For a closer look at compatible watering accessories, browse our selection of garden sprinklers and hose nozzles as complements to your drip setup.
Step-by-Step Setup Guide
Setting up a gravity fed drip irrigation system for raised beds is a weekend-friendly project that most gardeners can complete with basic tools. Follow these steps for a reliable installation:
-
Choose and Elevate Your Reservoir
Select a rain barrel or water tank sized to your garden's needs. A 30- to 55-gallon barrel is typical for a small raised bed setup. Place it on a sturdy, level stand or platform so the outlet sits 3 to 5 feet above the drip lines. Ensure the platform can support the full weight of the filled reservoir.
-
Install the Outlet Fitting
Drill and install a bulkhead fitting near the bottom of the reservoir. Attach a shut-off valve and then the inline filter. Use thread seal tape on all connections to prevent leaks.
-
Run the Mainline Tubing
Connect the mainline tubing to the filter outlet and route it toward your raised bed. Keep the run as short and direct as possible to preserve pressure. Secure the tubing with stakes or clips along the way.
-
Lay Out the Drip Lines
Run drip lines across the surface of the raised bed, spacing them 12 to 18 inches apart depending on the plants. For row plantings, one line per row works well. For dense plantings, use a grid pattern.
-
Install Emitters
Punch holes in the drip line at each plant location and insert pressure-compensating emitters. Alternatively, use inline drip tubing with pre-installed emitters at a set spacing. Position emitters near the base of each plant.
-
Add a Timer or Valve
Install a manual ball valve or a battery-operated timer at the reservoir outlet. A timer automates watering and helps maintain a consistent schedule.
-
Cap and Flush
Close the end of each drip line with an end cap or flush valve. Turn on the water and flush the lines for a minute before inserting emitters, then check that each emitter is flowing evenly.
-
Test and Adjust
Run the system for a full cycle and observe the flow at each emitter. Adjust emitter placement or line length if you notice uneven watering. Fine-tune the run time based on soil moisture.
If you're also growing vegetables in your raised beds, the same principles apply to specific crops. Our guides on growing carrots and supporting tomatoes in a raised bed pair well with a drip irrigation setup, since both crops benefit from consistent moisture.
Designing Your Raised Bed Layout
A well-designed layout maximizes efficiency and ensures every plant receives adequate water. Start by mapping your raised beds and identifying the reservoir location. The reservoir should be positioned so that lines run downhill or level — never uphill — to maintain pressure.
Line Spacing and Emitter Placement
For most vegetables and flowers, drip lines spaced 12 to 18 inches apart provide good coverage. If your raised bed is 4 feet wide, two lines running the length of the bed are usually sufficient. For larger plants like tomatoes or peppers, position a dedicated emitter near each stem. For dense plantings like lettuce or herbs, inline drip tubing with emitters every 12 inches works well.
Zoning and Run Length
Keep each zone within the pressure limits of your system. A single 1/2-inch mainline can typically support up to 200 feet of drip line at low pressure, but for gravity systems it's safer to keep total run length under 100 feet per zone. If you have multiple beds, consider splitting them into separate zones controlled by individual valves. This also lets you water different crops on different schedules.
Integrating with Other Garden Features
Gravity drip systems work well alongside other passive watering features. For example, a rain garden or drainage solution can help manage excess water, while a compost bin or compost tumbler nearby makes it easy to enrich the soil in your beds. If you're planning a larger landscaping project, our guides on driveway landscaping and gravel landscaping can help you coordinate irrigation with hardscape elements.
Maintenance and Troubleshooting
Gravity drip systems are low maintenance, but a few routine tasks keep them running smoothly season after season.
Routine Maintenance
Flush the lines at the start and end of each growing season by removing the end caps and letting water run through for a few minutes. Clean the inline filter monthly during peak use — especially if you're using rainwater, which can carry fine sediment. Check emitters periodically for clogs and replace any that are flowing unevenly. In cold climates, drain the reservoir and lines before the first freeze to prevent cracking.
Common Issues and Fixes
| Problem | Likely Cause | Solution |
|---|---|---|
| Uneven watering | Non-compensating emitters or excessive run length | Switch to pressure-compensating emitters; shorten runs |
| Low or no flow | Clogged filter or emitter | Clean filter; flush lines; replace clogged emitters |
| Water leaking at fittings | Loose connection or missing seal | Tighten fittings; add thread seal tape |
| Algae growth in reservoir | Clear tank exposed to sunlight | Use an opaque tank or cover; clean regularly |
For gardeners dealing with weed pressure around beds and pathways, our guides on killing grass and weeds in flower beds and killing weeds in a gravel driveway offer practical solutions that won't interfere with your irrigation setup.
Choosing the Right System for Your Raised Beds
Gravity drip systems are available in several configurations, from simple DIY kits to more comprehensive setups. The right choice depends on the number of beds, your water source, and how much automation you want.
Entry-Level vs. Mid-Range vs. Premium Setups
Entry-level gravity drip kits typically include basic tubing, a small filter, and a handful of emitters. They're a good fit for a single raised bed or a small garden and are easy to assemble without special tools. Mid-range systems add pressure-compensating emitters, a larger filter, and a timer, offering more consistent watering across multiple beds. Premium setups may include a larger reservoir, brass fittings, and a multi-zone manifold for gardeners who want maximum reliability and expansion capability.
When comparing options, focus on the emitter type (pressure-compensating is best), the filter quality, and the availability of replacement parts. A system with standard components is easier to maintain and expand over time. If you're also considering broader garden tool investments, our gardening tools category and budget-friendly tools guide can help you round out your equipment.
Frequently Asked Questions
How much water pressure does a gravity fed drip irrigation system need?
Most gravity fed drip systems operate effectively with just 1 to 5 PSI of pressure, which is generated simply by elevating a water reservoir above the raised bed. A height difference of about 2.3 feet per 1 PSI is a good rule of thumb, so a tank elevated 3 to 5 feet typically provides enough pressure for standard drip emitters.
Can I use a gravity fed drip irrigation system with a rain barrel?
Yes, rain barrels are one of the most common water sources for gravity fed drip systems. Elevate the barrel on a sturdy stand so the water outlet sits higher than the drip lines, use a filter to keep debris out of the emitters, and connect a pressure-compensating drip line for even watering across the raised bed.
How long should I run a gravity fed drip irrigation system?
Because gravity systems deliver water slowly, run times are typically longer than pressurized systems. Most raised bed setups need 30 to 90 minutes per session depending on emitter flow rate, bed size, and weather. Use a timer or manually monitor soil moisture to fine-tune your schedule.
Do gravity fed drip systems work for large raised beds?
They work best for small to medium raised beds within a reasonable distance from the reservoir. For larger beds or long runs, choose pressure-compensating emitters and keep the total line length within the manufacturer's recommendation to maintain consistent flow at every plant.
Can I connect a gravity drip system to my outdoor faucet instead of a barrel?
Yes, but you'll need a pressure reducer because household water pressure is far too high for drip emitters. A pressure reducer that steps the flow down to 10–25 PSI is typically required. For a true gravity system, a reservoir is the simpler and more reliable approach.
Grow More with Less Effort
A gravity fed drip irrigation system for raised beds is one of the most practical investments a home gardener can make. It conserves water, reduces hand-watering chores, and keeps your plants consistently hydrated — all without electricity or complex plumbing. Whether you start with a simple rain barrel and a few drip lines or build out a multi-zone system, the principles in this guide will help you water smarter and grow healthier gardens.